A Christmas Art Lesson
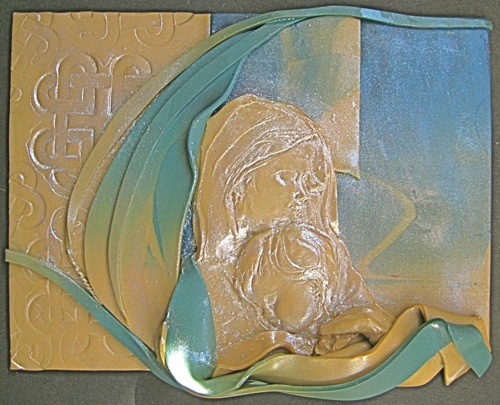
In this Christmas art lesson, I hope to show you my process of creating the polymer clay relief sculpture below. I create really low reliefs in polymer clay, preferring not to build out too much. I have created some sculpture in the round using armatures, but polymer clay does not lend itself to readily to building in heavy masses.
As a mother, I am always moved to create some Christmas art that involves the mother and child.
At this time of the year, I find myself pondering the complex emotions that are so inextricably bound up in the relationship of a mother and child. Especially profound must have been those of Mary, who knew that her child was destined for an unknown, but momentous future.
This project attempts to explore that relationship, and those emotions.
Please click to enlarge the images for a closer look.
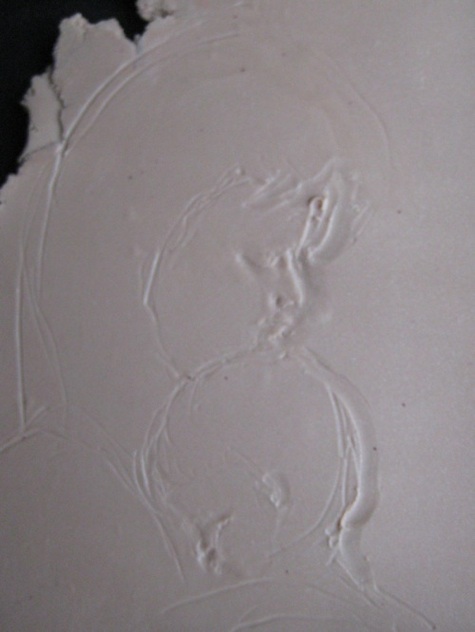
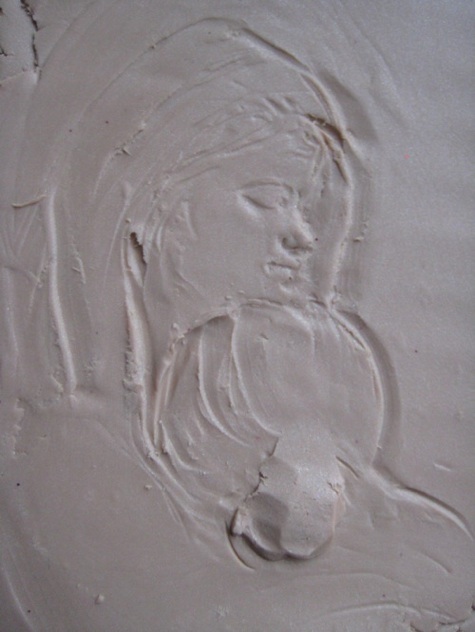
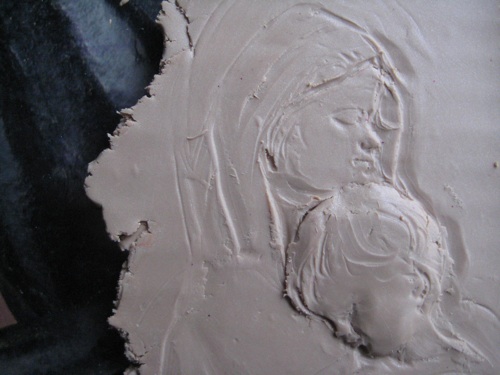
You can see how I built the image slowly, from a flat sheet of clay. I began with simply incising a rough drawing, and then built up only the areas that I felt need dimensionality. A little extra clay was added for the baby's cheek.
As I work, I long to somehow convey the vulnerability of the baby who gave up all heaven's majesty, for me! The wonder of the divine plan, is something that never ceases to amaze me!
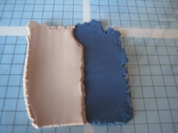
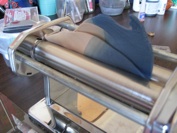
Using the Skinner Blend technique, I worked on a blended background for the relief.
To create a soft transition between the blue and cream clays, I folded the clays together and sent it through the pasta machine, fold side down. After sending it through several times, I arrived at the blend you see. This created the mystery that I was hoping for in the background.
Using a rubber stamp helped add some geometric detail to the background. I love polymer clay for its sensitivity to any impression - from fingerprints (not my favorite!!) to any texture - like this beautiful stamp.

To further enhance the surface, I sprinkled some silver pearl metallic powder on the surface of the work and gently smoothed it in. In the baking process it fused with the clay and gave it the shimmer.
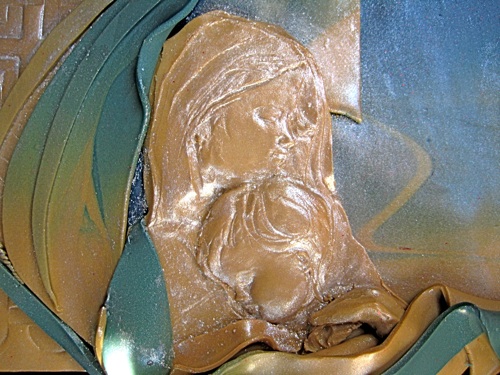
Finally, I cut strips from the left-over blue and cream clay, to form the drapes and finish the work. Combining all the various parts of the relief in a pleasing manner was the most enjoyable part.
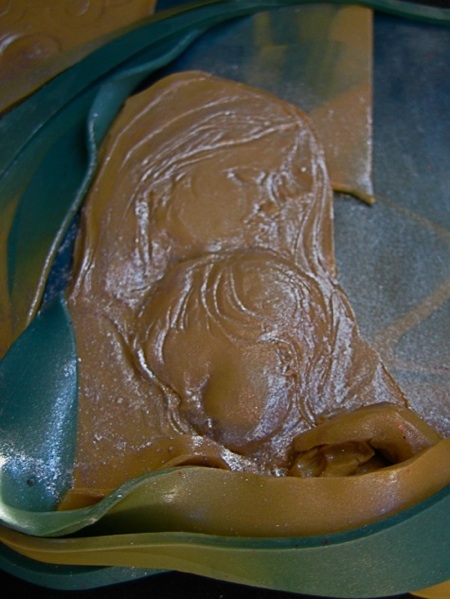
As you look at the detail image below, you'll have a better idea of the depth of relief that I eventually settled on. This is an important consideration when creating reliefs. All the various components must protrude credibly, at various depths, from the basic surface of the work. When I felt satisfied with the outcome, it was sent to the oven to become firm and permanent.
I hope that you benefited from this picture trail of my Christmas art project. Have fun creating your own!

Recent Articles
-
Contemporary Christian Art
May 11, 23 06:24 PM
 Contemporary christian art: A fresh take on the beloved and familiar Psalm 23.
 -
Grief, Joy and Art
May 05, 23 04:43 PM
 Grief, Joy and Art is a true story woven around a work of art and a romance born from grief and loss
 -
Pro-life Art
Jun 29, 22 05:23 PM
 Pro-life Art: a celebration of life despite its many challenges